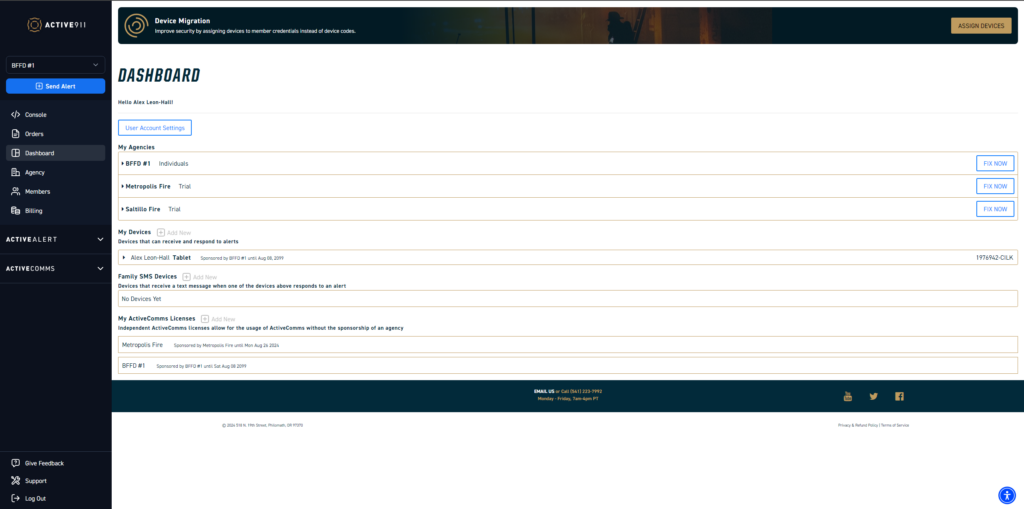
Now that you have started your trial of ActiveAlert, it’s time to get familiar with the different areas of the website when you login at Active911.com. This tutorial serves as only a quick walk-through to get you familiar with the different areas of the website. We will go into further details of each page in our other tutorials.
The website is where you will set-up your agency’s filters, groups, and devices. The main navigation takes place in the left-side menu. There are multiple sections for the different products ActiveAlert and ActiveComms, as well as tabs foryour dashboard, agency, members, and billing

When you first login you will be directed to the Dashboard. This is where you will see information on all the different agencies you are a part of as well as where you can change your password.
On the Agency page, you will see all the information about your agency account, including address and phone number. You can also set-up agency specific filters and options on this page.
On the Members page, you will see a list of all members assigned to this agency held within a table. This table’s column include status, name, email, phone number and what licenses they have assigned to them.
The Billing page is where you will manage renewals for your products. You will also be able to add more licenses and assign licenses to devices on this page.
ActiveAlert
Under this tab you can make changes to your ActiveAlert settings, see alerts, analytics and more.
On the Alerts page, you can see every alert that has been received for your agency and get any further details you may need from an alert.
In the Analytics tab, you can access a variety of analytics reports about your agency, such as Busiest User, Busiest Addresses, Busiest Hours, and Alert Type Breakdown.
The Assignments page allows you to create specific assignments for the personnel in your department.
On the Devices page, you can create devices for your personnel and vehicles.
The Family page is where you can create Family SMS devices. Learn more about Family SMS here.
On the Groups page, create custom groups for your agency that can be used to filter alerts to specific personnel.
The Map Data page is where you will upload map marker data such as fire hydrants or pre-plans. Note that this is for uploading and downloading map data only, there is no map on this page to see where the markers are located.
ActiveComms
The Channel Management page is where ActiveComms admins can add new, edit or delete channels.
The Feature Selections page is where Preset tones can be viewed, created, edited or deleted.
The Radio Bridge Configuration page is where you can manage the radio bridges assigned to your agency. From here you can make changes to Radio Channel names, adjust the volume of radio to phone and vice versa.
That was a quick walk-through of the Active911 website.
Check out our other tutorials to learn more about using these various pages as well as understanding how the ActiveAlert mobile app works.
If you would like any help getting your agency set-up on ActiveAlert, please reach out to our team at 541-223-7992 or at [email protected].
